
A higher annual volume does not automatically buy a lower unit price. In custom manufacturing, the yearly quantity you state on an RFQ is not a sales forecast that sits idle in a spreadsheet — it is a planning input that decides how a fabricator reserves capacity, buys material, and chooses tooling. Get that number wrong, and the quote, the schedule, and the process route all follow the error.
What Annual Volume Means on a Manufacturing RFQ
In a purchasing context, annual volume is the total quantity of a given part or assembly you expect to order from a supplier over a 12-month period. It is a forward-looking planning figure, not a historical sales statistic and not a single purchase-order line.
Three nearby terms are often mixed up with it.
| Term | What it counts | Time horizon | Primary use |
|---|---|---|---|
| Annual volume | Total yearly units for one part or family | 12 months | Capacity, tooling, pricing |
| Order quantity | Units on one PO or release | Single transaction | Production run, shipment |
| MOQ | Minimum units a supplier will accept per order | Per order | Floor on lot size |
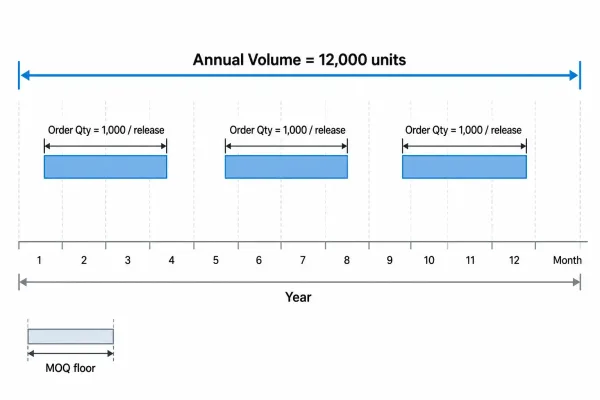
Simple timeline diagram showing annual volume as a full-year total, order quantity as one release lot, and MOQ as a minimum lot floor.
Annual volume vs. order quantity. A part with an annual volume of 12,000 units may still ship in monthly releases of 1,000. The annual figure tells the supplier how to plan; the order quantity tells the shop how to run one batch.
Annual volume vs. annual demand forecast. A demand forecast is usually owned by sales or operations and may include parts you buy from several sources. Annual volume on an RFQ should reflect only the quantity you intend to place with that supplier, under the process and material combination you are quoting.
If the number is only a rough guess, say so. A labeled estimate is more useful than a precise-looking number that is quietly wrong.
Why Suppliers Ask for This Number Before They Quote
Fabricators do not ask for annual volume to pad a form. The number feeds three decisions that must be made before a firm price and lead time can be issued.
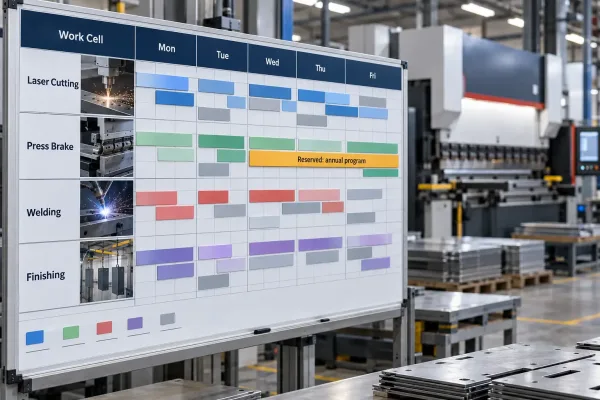
A shop-floor scheduling board showing laser, press brake, and welding cells with reserved capacity windows for a yearly program.
Capacity reservation and scheduling
Sheet metal work is scheduled in windows. Laser cutting, press-brake forming, welding cells, and finishing lines each have finite weekly hours. A credible annual volume lets the supplier judge whether your part belongs in a reserved cell, a rotating job shop flow, or an overflow queue. Without it, the quoted lead time is a guess.
Material procurement and mill commitments
Material is often the largest cost block. Coil and sheet are purchased against expected usage. If annual volume supports a mill-direct buy or a full-coil commitment, unit material cost drops and availability improves. If volume is low, the supplier buys from service-center stock at a higher per-pound rate and accepts longer replenishment risk.
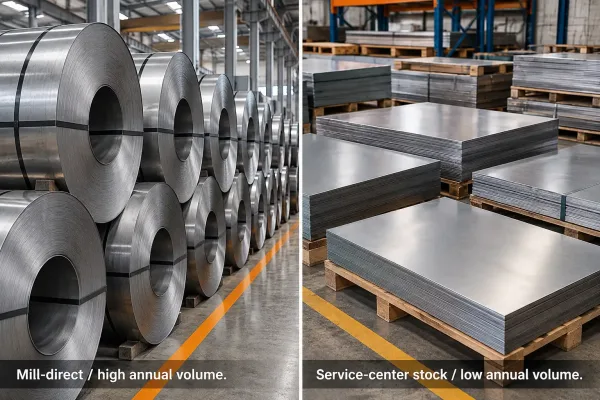
Side-by-side industrial photo of a large mill coil buy versus cut-to-size service-center sheets, labeled for annual volume scale.
Release frequency vs. one-shot runs
The same annual volume can be ordered as twelve monthly releases or two large campaigns. Monthly releases favor repeatable setups and steady labor loading. Campaign runs favor higher material utilization and fewer changeovers, but they demand warehouse space and cash. The annual figure alone is not enough; the supplier also needs to know how you plan to pull the quantity.
How Annual Volume Changes Your Unit Price
Unit price in custom parts is not materials plus markup. It is a stack of fixed and variable costs spread over the units you actually order.
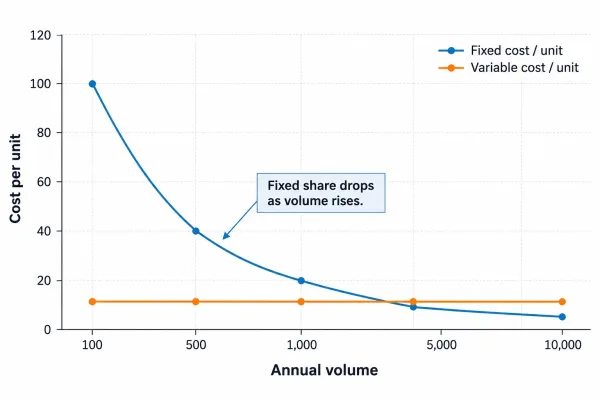
Chart showing fixed setup cost per unit falling as annual volume rises, while variable cost stays flat.
Fixed cost amortization across the year
Setup, programming, first-article inspection, and process qualification are largely fixed per part number. Split over 200 units, those costs dominate the unit price. Split over 20,000 units, they become a rounding error. A typical low-volume sheet metal part might see 30–50% of its unit cost tied to fixed activities; a steady mid-volume part can drop that share below 15%.
Where price-break thresholds actually come from
Price breaks are not arbitrary discount tables. Each tier usually marks a point where one of the following changes:
- Material moves from service-center stock to mill-direct buy
- A soft fixture becomes worth hardening into dedicated tooling
- Changeovers drop enough that labor per unit falls
- Inspection can shift from 100% to sampling on stable features
That is why doubling annual volume rarely halves the unit price. Variable costs — material weight, cut length, weld length, finish area — do not scale down the same way fixed costs do.
How Annual Volume Drives Tooling and NRE Decisions
Annual volume is one of the strongest signals for how much non-recurring engineering (NRE) and tooling a project can justify.
Soft tooling vs. hard tooling thresholds
Soft tooling covers standard punches, universal press-brake tooling, modular fixtures, and CNC-programmed operations. It keeps NRE low and suits prototype through low-mid volumes — often the practical route below a few thousand units per year for simple brackets.
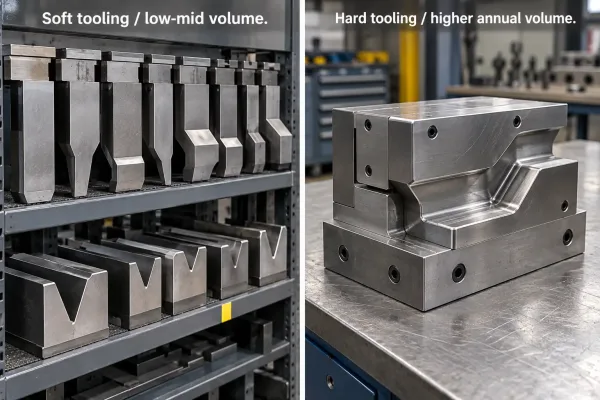
Side-by-side photo of universal press brake tooling versus a dedicated form die, with short labels on volume ranges.
Hard tooling covers dedicated form tools, progressive or compound dies, dedicated check fixtures, and hard automation. It raises NRE and lead time, but cuts cycle time and stabilizes quality once volume is high enough to repay the investment. For many sheet metal families, that crossover sits in the mid-thousands to low tens of thousands of units per year, depending on part complexity and secondary operations.
Amortization, ownership, and mid-life volume changes
If the supplier invests in dedicated tooling, three points must be explicit in the RFQ or PO:
- Who owns the tool after the run
- How NRE is amortized (fully in the first order, or spread over an agreed volume)
- What happens if annual volume changes after tooling is built
A volume cut after hard tooling is paid off leaves the supplier with idle asset cost. A volume increase after soft tooling is frozen can force a process change mid-life — which is when dimensional drift and approval delays appear.
How to State Annual Volume on an RFQ
Split the number into what you know and what you expect.
Firm volume vs. forecast volume
- Firm volume is quantity you already have orders or contracts for, or will commit to buy. It supports capacity reservation and mill-direct material buys.
- Forecast volume is planning upside. It can guide tooling class and price-tier discussion, but it should not be treated as a guarantee.
A clear RFQ line might read: firm 4,000 units/year for two years; forecast additional 2,000–3,000; monthly releases of 300–400; tolerance on annual total ±15%.
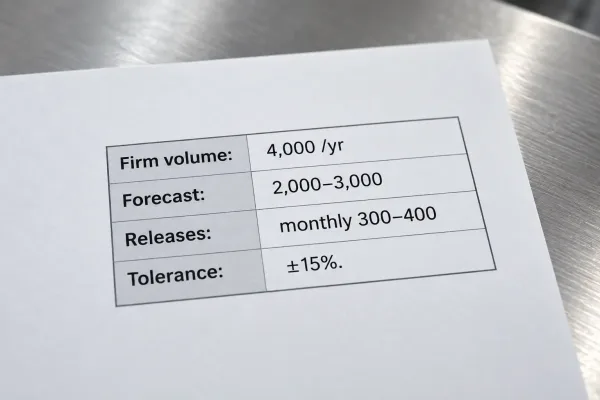
Close-up of a clean RFQ quantity section with Firm Volume and Forecast Volume fields filled in, plus release frequency.
What to do when volume is still uncertain
If the program is still in development, state a range and the decision date, not a single invented point. Example: 500–2,000 units in year one, firm quantity to be confirmed after pilot validation in Q3. Suppliers can price two tooling paths against a range; they cannot protect a schedule against a hidden floor they were never told about.
What Happens When Actual Orders Diverge from the Stated Volume
Plans change. The cost of that change depends on how far and how early the new reality departs from the stated annual volume.
- Orders above forecast may consume reserved capacity reserved for other programs, trigger material shortages, or require a tooling upgrade that was never priced. Expect longer lead times or a price revision until a new baseline is agreed.
- Orders below firm can strand mill commitments, leave dedicated fixtures under-amortized, and move you back into higher unit-price tiers. Some suppliers will re-quote the remaining releases at the soft-tooling rate.
- Volume shifted mid-year is often manageable if the annual total still holds and release rhythm is renegotiated. Volume collapse or a process change is not.
The practical mitigation is a short written note whenever the plan moves more than about 15–20% from the quoted basis. That single message prevents the re-quote spiral that damages both schedule and unit cost.
Practical Rules for Stating Annual Volume
Use the following checklist on the next RFQ:
- Define annual volume as units per part number for a 12-month period with that supplier only.
- Separate firm volume from forecast volume in writing.
- State release frequency (monthly, quarterly, campaign) alongside the annual total.
- Flag whether material is expected at service-center or mill-direct scale.
- Note tooling expectations: soft route acceptable, or hard tooling to be quoted as an option.
- Specify who owns tooling and how NRE is amortized if dedicated tools are used.
- Record the agreed tolerance on annual total (for example ±15%) and the trigger point for a re-quote.
- Send a written update if the plan moves materially — before the next release, not after.
These eight lines turn annual volume from a form field into a planning tool the supplier can actually quote against.
FAQs
